Shopify Integration
Connect your Shopify store to VeriFined for automatic product passports and certificates, with optional blockchain anchoring.
Overview
VeriFined integrates directly with Shopify: once you turn on order certificates, every new order placed in your store gets a product passport and, once fulfilled, a certificate of authenticity — with no manual work. Blockchain anchoring is optional and off by default. This guide explains how the integration works, what happens behind the scenes, and how to configure it.
What Gets Automated
With order certificates turned on (on the app's welcome screen, or later in Settings → Certificates), the following happens automatically for every new order. While they are off, orders create nothing in VeriFined: no products and no certificates.
- Product passport created — A digital record is created for each item in the order, with the product name, description and a unique UUID. It starts in Draft status.
- Images and descriptions synced — Product photos and descriptions are pulled directly from your Shopify product listing and attached to the passport. There is no need to re-enter this information.
- Status set to Active — Each product's status is automatically set to Active when the order is fulfilled. If blockchain anchoring is on for the product, Active products are anchored in the next hourly batch.
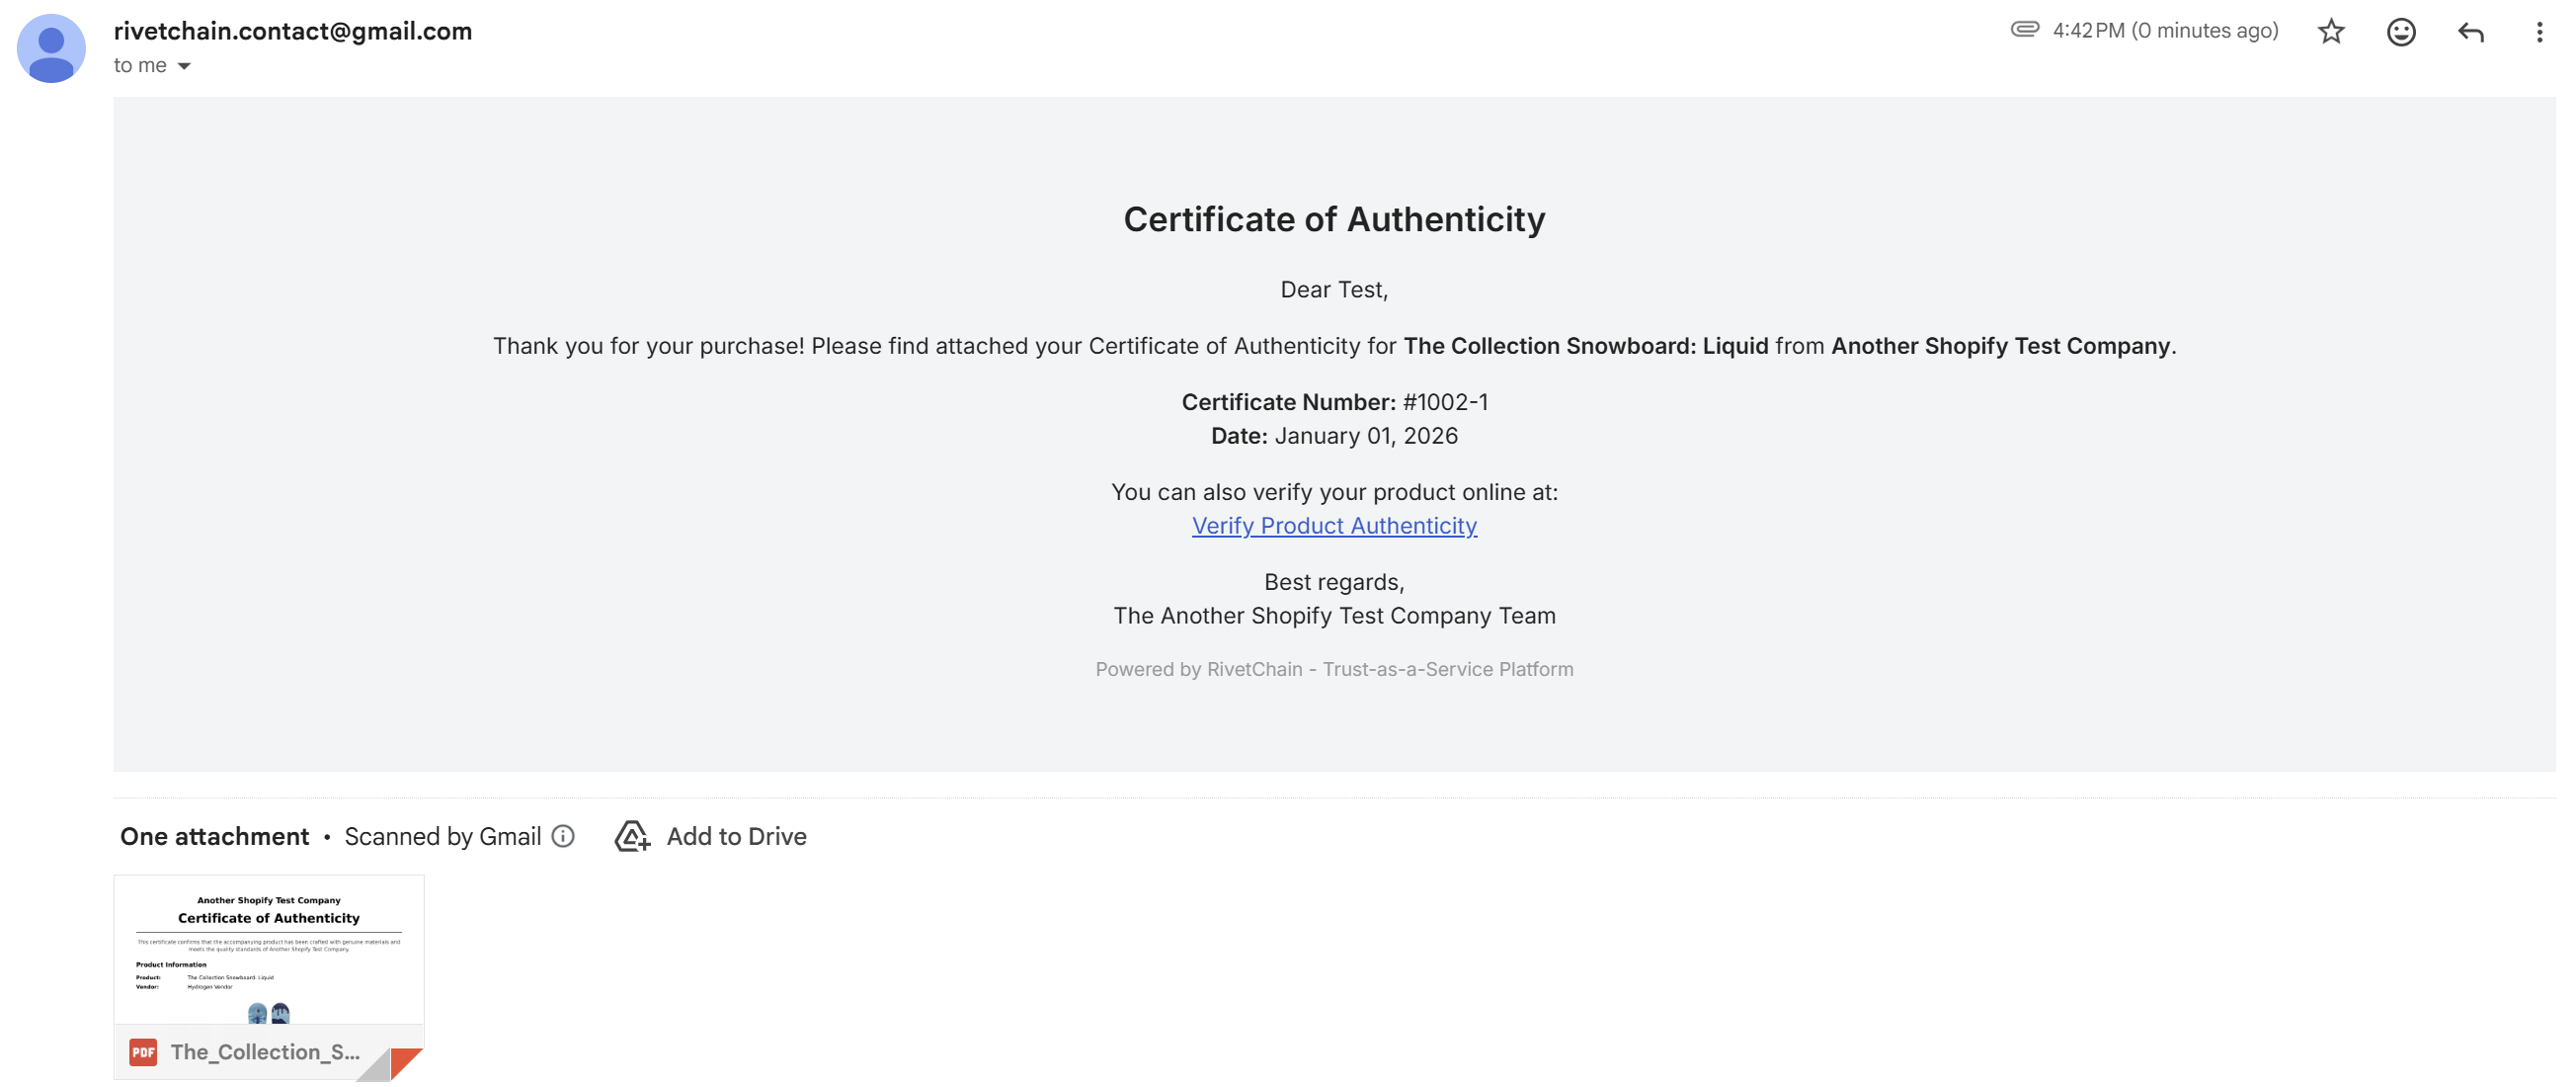
- Certificate generated and emailed — An authenticity certificate is generated for each product and emailed to the customer automatically upon fulfillment (unless you turned off automatic certificates or excluded the customer's or product's tags in Settings).
Connecting Your Shopify Store
Setting up the integration takes only a few minutes: install the app from the Shopify App Store and open it. There is no separate account to create.
- 1
Install the VeriFined app
Visit the Shopify App Store and search for "VeriFined" (listed as "VeriFined: Brand Protection"). Click Install to add the app to your Shopify store and approve the requested permissions.
- 2
Open the app
The first time you open VeriFined from your Shopify admin, your workspace is created automatically for your store — no separate account or login needed. If you already have a VeriFined web account, use "Connect an existing account" on the app's dashboard to move the store onto it.
- 3
Choose what to turn on
On that first open, a welcome screen asks what VeriFined should do for your store: "Certificates for your orders", "Brand Guard", both, or neither. Nothing starts until you press the button, and you can change it any time in Settings. Certificates start with the next order placed (not past ones), and each one is sent when you fulfil that order. Brand Guard needs its own plan, which you confirm with Shopify on the next screen — nothing is charged without that confirmation.
- 4
You are connected
From then on, the VeriFined app dashboard appears inside your Shopify admin. You will see your product statistics, usage, and settings — all manageable without leaving Shopify.
The Shopify App Dashboard
The VeriFined app inside your Shopify admin provides three main sections, plus a Help tab:
- Overview — Shows your total product passports, how many have been claimed by customers, and how many are pending. Also displays your current plan usage and a summary of how the automation works.
- Products — Lists all products that have been automatically created from Shopify orders. You can search, filter, and click into any product to view its details, custody events, files, verification status, and certificates.
- Settings — Configure your company profile, categories, statuses, verification page appearance, certificate template, and view billing details — all from within the Shopify app.
- Help — Opens the in-app help panel, where you can search help articles, send a request to our team and see our replies. The "Get support" button on the app's Shopify App Store page opens the same form.
How Orders Become Passports
Understanding the flow from Shopify order to product passport helps explain what your customers experience.
- 1
Customer places an order
A customer purchases a product from your Shopify store. VeriFined receives the order and creates a product passport for each item, in Draft status, with the product name, description, and images from your Shopify listing.
- 2
You fulfill the order
When you mark the order as fulfilled in Shopify (or it is fulfilled automatically), VeriFined receives a webhook notification and begins processing.
- 3
Passport is activated
The status changes to Active and a fulfillment event is recorded on the passport.
- 4
Certificate is emailed
An authenticity certificate is generated automatically and sent to the customer's email address (unless you turned off automatic certificates or excluded the customer's or product's tags in Settings). The certificate includes a QR code linking to the public verification page.
- 5
Blockchain anchoring
If blockchain anchoring is turned on for the product (for example with the Settings → General option "Automatically anchor products from fulfilled orders on the blockchain"), its data is anchored in the next hourly batch. Once anchored, the product has full three-tier verification: database integrity, blockchain proof, and IPFS payload.
Configuring Settings from Shopify
You can manage most VeriFined settings directly from the Shopify app without visiting the VeriFined website. The Settings tab inside the app includes:
- General — View your connected company name, Shopify domain, connection status, subscription plan, and usage statistics. Turn on automatic blockchain anchoring for fulfilled orders and list product tags to skip entirely (no passport, events or certificate).
- Profile — Set your company alias, description, and social media links. This information appears on public verification pages.
- Categories — Create and manage product categories to organize your passports.
- Statuses — Define custom product statuses with colors to match your business workflow.
- Verification — Customize the public verification page that customers see when they scan a QR code. Control which information is displayed and set your branding (logo, colors).
- Certificates — Configure your certificate template including authenticity and quality statements, turn automatic certificates on or off, and list customer tags that should not receive certificates.
Customer Experience
From your customer's perspective, the experience is seamless. After their order is fulfilled, they receive an email with their product's authenticity certificate. The certificate contains a QR code that links to the public verification page, where anyone can confirm the product's authenticity. For products with blockchain anchoring turned on, the page also checks the blockchain proof and the IPFS record.
Customers do not need a VeriFined account to verify a product. The verification page is public and works on any device with a browser.
Verification Badge on Order Pages
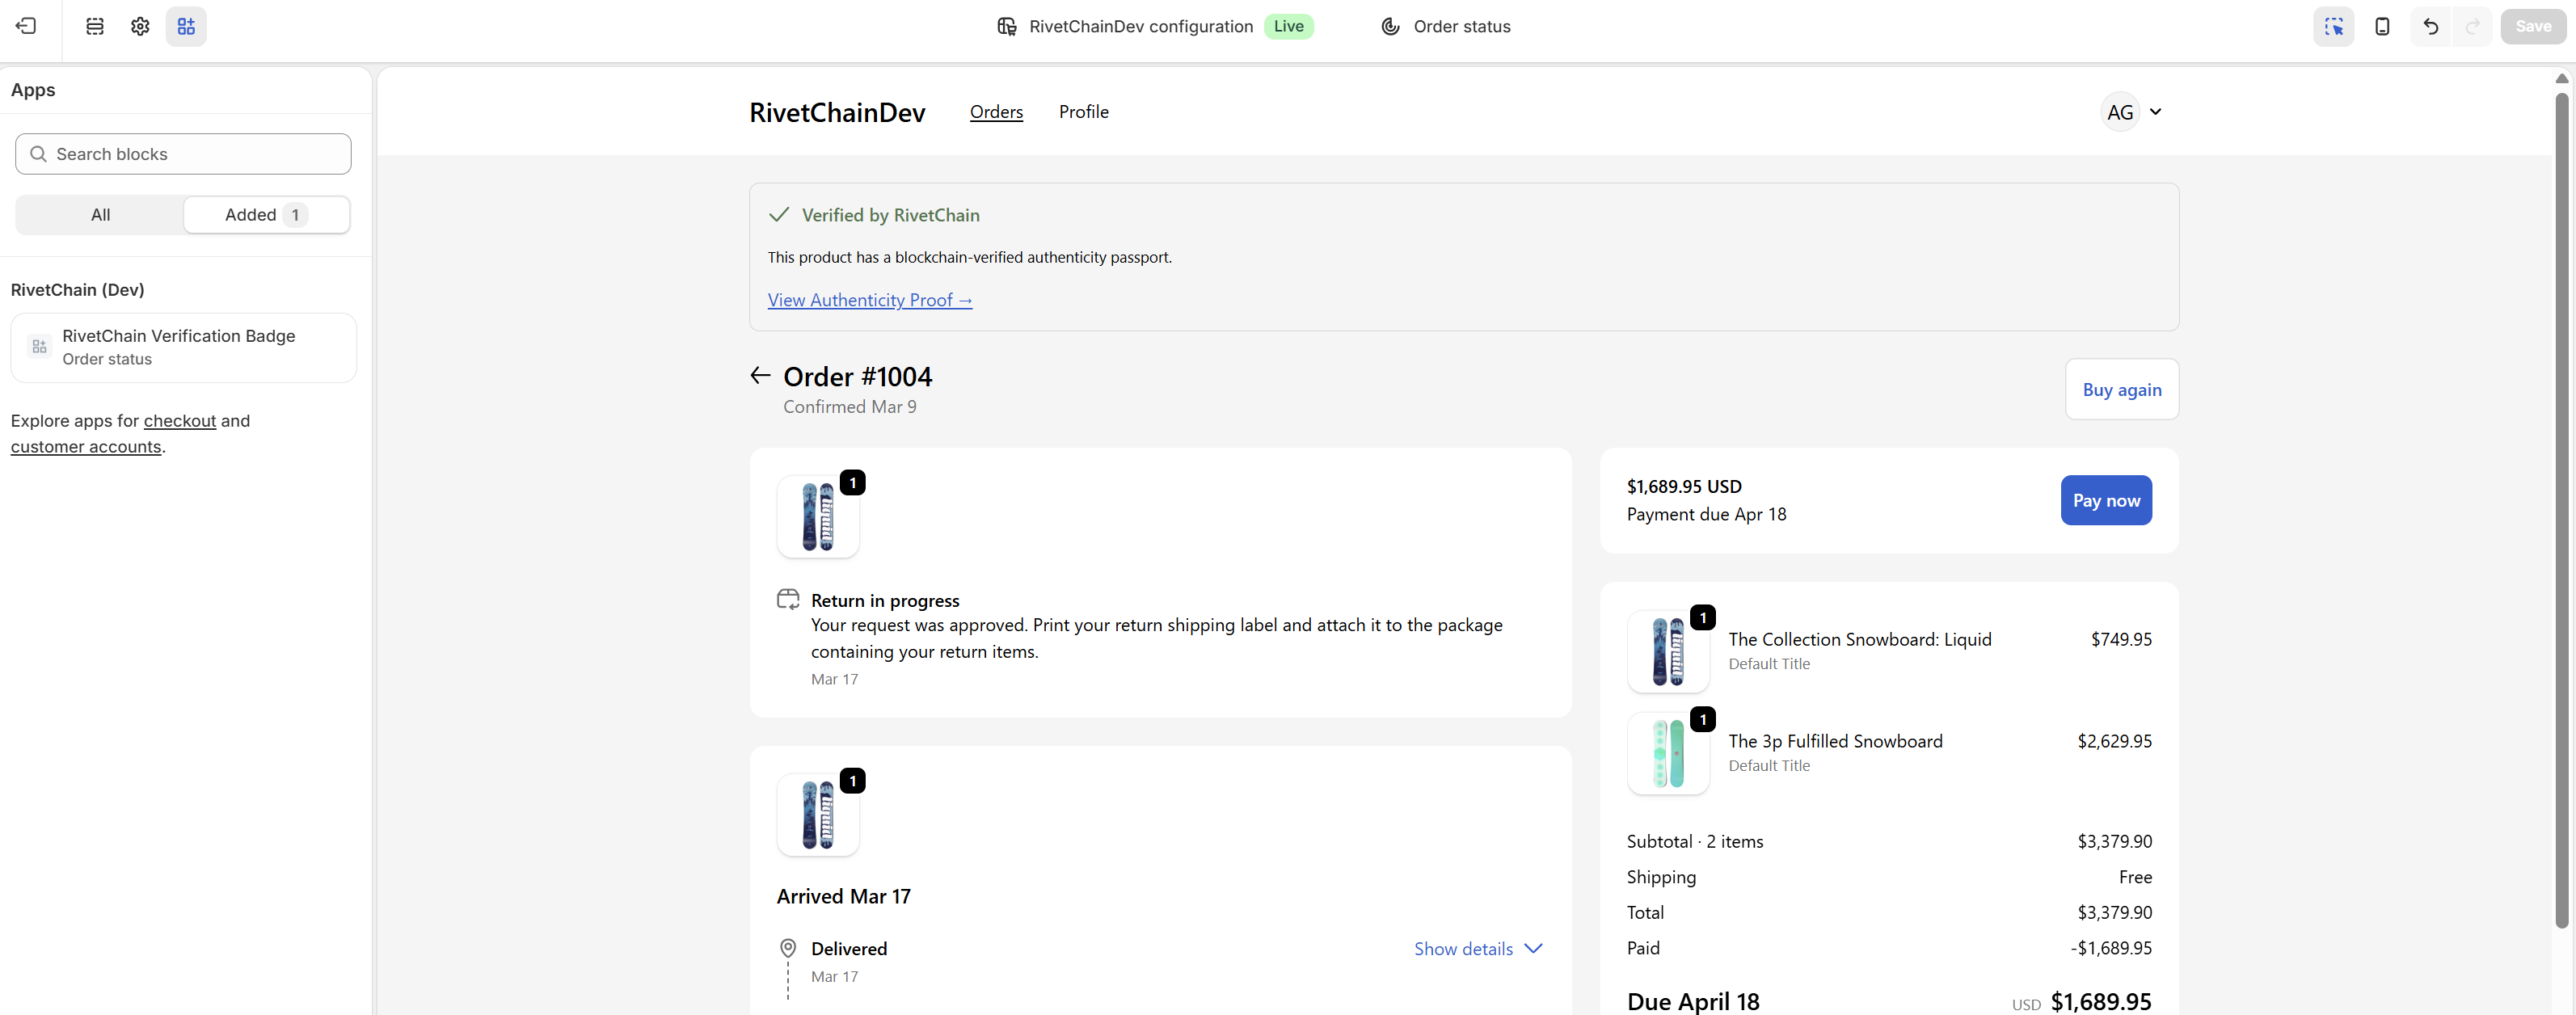
The app includes an order verification badge that you can add to your customers' order pages in Shopify customer accounts. When a customer views their order, they see a "Verified by VeriFined" badge with a direct link to the verification page for their purchase. The badge is always labeled VeriFined, the app's name on the Shopify App Store.
Adding the Badge to Your Store
The badge is added in Shopify's checkout and accounts editor (not the theme editor). Follow these steps to enable it:
- 1
Open Customer accounts settings
In your Shopify admin, go to Settings → Customer accounts. Make sure new customer accounts are enabled, then click Customize to open the checkout and accounts editor.
- 2
Choose the page
In the page selector at the top, choose the Order status page. The badge can also be added to the Orders list page.
- 3
Add the VeriFined badge
Click Add block (or the + icon) and choose "VeriFined Verification Badge" from the Apps section. Drag it to your preferred position. You can change the badge title and description in its settings.
- 4
Save your changes
Click Save. Customers will now see a "Verified by VeriFined" message with a "View Authenticity Proof" link that takes them directly to the verification page for their order.
Refunds
When you refund an order in Shopify, VeriFined records a refund event on the passport of each refunded item and changes its status to Refunded. For products with blockchain anchoring turned on, the status stays as it is (anchored records can't be changed) and the refund is recorded as an event in the product's history instead.
Importing Orders Manually
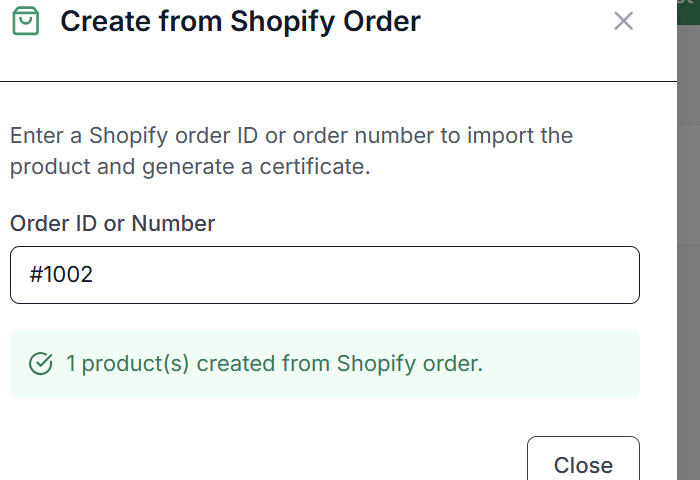
With order certificates on, VeriFined automatically creates product passports from new Shopify orders. If you have older orders that were placed before that, you can import them manually using the "Create from Shopify Order" feature (it needs order certificates turned on too).
- 1
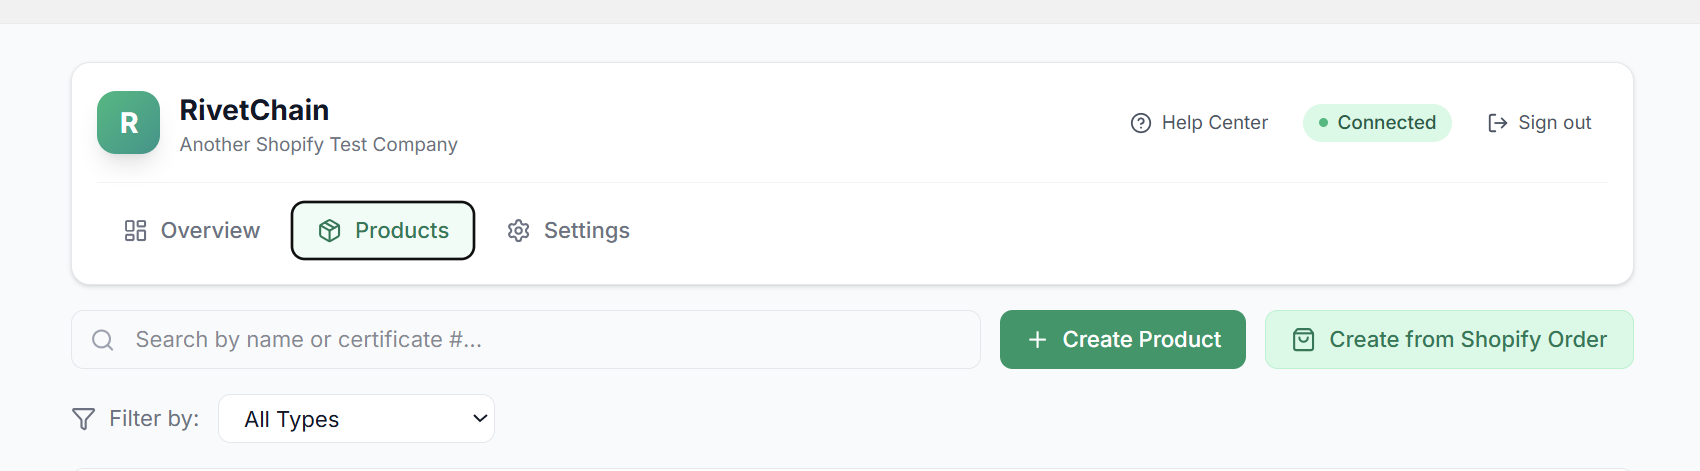
Click "Create from Shopify Order"
On the Products page, click the "Create from Shopify Order" button. This button is only visible when your company has a Shopify store connected.
- 2
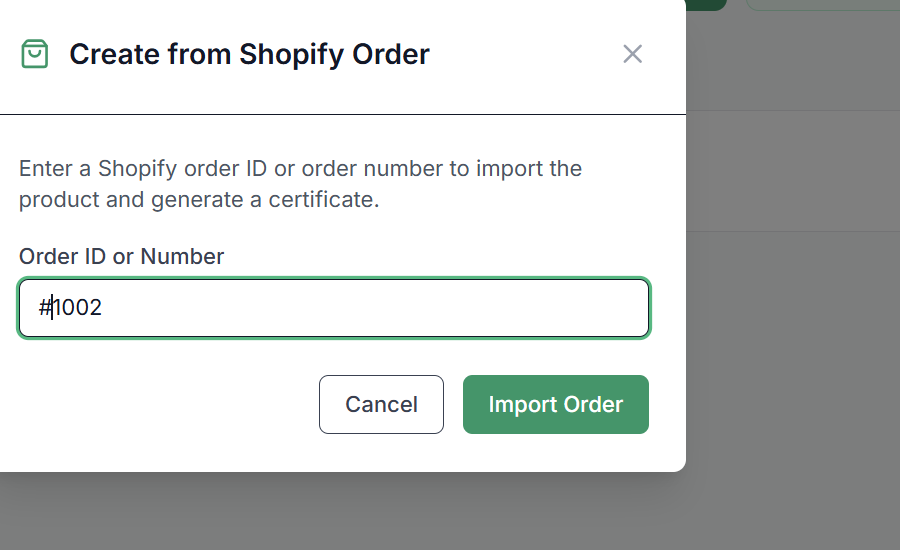
Enter the order ID or number
In the modal that appears, enter the Shopify order number (e.g. #1002) or the numeric order ID. You can find the order number in your Shopify admin under Orders.
- 3
Click "Import Order"
Click the Import Order button. VeriFined will fetch the order details from Shopify, create the product passport, and — if the order has been fulfilled — automatically generate the authenticity certificate and email it to the customer.
- 4
View the imported product
After importing, the product appears in your product list. Click on it to see its details, custody events, verification status, and the generated certificate.
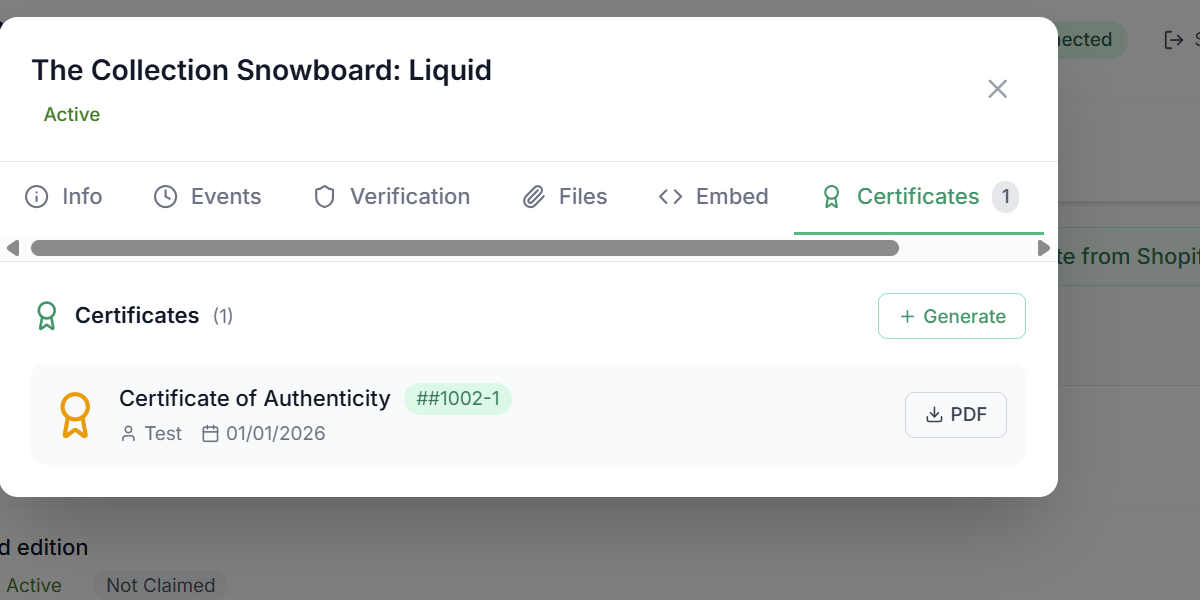
If the order was already fulfilled in Shopify, the customer automatically receives an email with their Certificate of Authenticity, including a QR code for verification.